Follow Me

Close

You may remember when we did a post a while back about using Google Sketchup for design and construction concepts.  Well, today I wanted to share something VERY exciting with you.  One of the rooms that we put in Sketchup to help our client visualize the space and make decisions on finishes is now on its way to completion.  I received a photo of it the other day, and I was floored at how amazingly similar it looked to our Sketchup rendering.  Take a look below!

This is the original image as it was built in Sketchup- we used the program to build this room from the plans to help choose finishes, furniture and accessories.

spa bath updated

This is a photorealistic rendering that we did of the original image to make it more realistic and help our client visualize how it was really going to look:

spa bath updated 2013-04-12 12541900000

Our client approved the finishes, wood, etc, and the building and installing began.  This is a photo of the progress of the room so far:

unnamed

Isn’t that amazing?  Remember, in the first and second images, the room in the third photo was not in existence!  The first two images are 100% computer generated.  This really goes to show how far technology and design have come, and the possibilities of how far we can go with tools like this are endless!  Just thought I would share!

Today we are excited to have a guest post for your viewing pleasure!  We would like to say a big thank you to Bryan from BuildDirect.com for contributing a super informative post on PAINTING your wood floor.  How unique and fun is that?  Painting a wood floor can either add a traditional, rustic, or eclectic look to your room, depending on how you do it.  If you have any questions along the way, or just want to find out more, you can visit BuildDirect.com for yourself for help, or for more great ideas!  So, without further ado, take it away Bryan!


Get a Fresh Look: How to Successfully Paint Wood Floors


If there’s one thing I love about wood floors, it’s gotta be versatility. Refinish ‘em, stain ‘em or paint ‘em, it’s absolutely up for you to decide. Yes, you read that correctly: paint ’em.


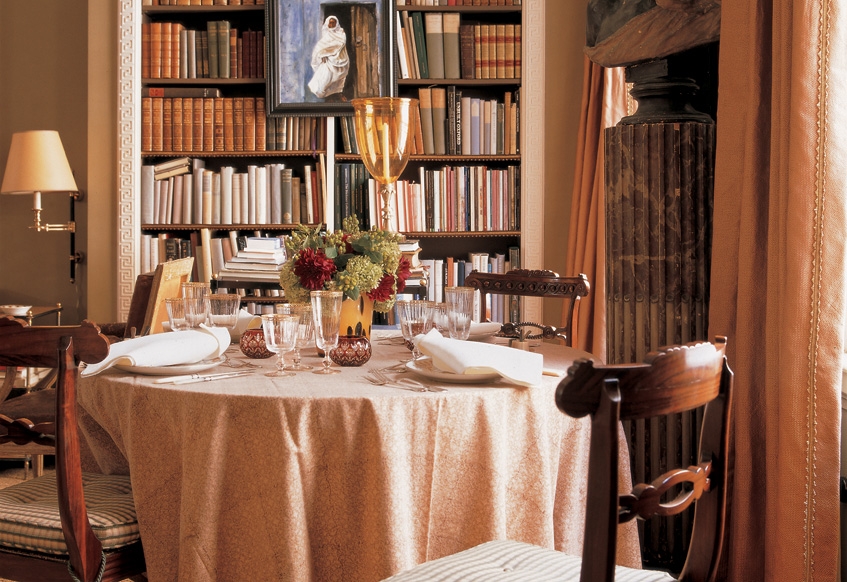
Painting floors has been practiced in North America since the late 1700s. Styles varied from monochromatic plains to parquet-like patterns, and popular colors included white, yellow, green and red. More than just for aesthetics, painting wood floors helped protect the wide plank wood floors that were popular at that time.

How to paint floors | Home on the Range

http://bohemianhellhole.typepad.com/


Following rapid development and industrialization advancements, painted wood floors took a backseat and gave way to carpets, clear coats and manufactured floor covering like linoleum and vinyl. However, artistry and creativity have once again made painted wood floors very popular.


Inexpensive, vibrant, and easy are just a few of the reasons that people have turned to painted wood floors for a quick update to make their rooms look fresh and brand new.


Here are the steps to follow to successfully paint wood floors:


Be sure to know what you’re doing and gather your materials.


Read, watch, ask and research how to do it, more so if you intend to do it yourself so you get familiar with the tools you need, how to use them and how much they’ll cost. More importantly, try to find out more about the wood floor you intend to paint so that you know which paint products will work best with them.

How to paint floors | Home on the Range

http://woodenfurniturehub.com/


Prepare and clean them up.


Preparing means removing all furnishing and fixtures together with any protective or decorative additions to the wood floors to be painted like mats and area rugs. If the wood floors have been some form of coat or finish, sand them off. You can have local contractors include it in the project or you might want to head out to Home Depot or other similar shop to rent out a machine for $50 or so a day. If you’re sanding it yourself, remember not to stay too long on a particular spot so that you don’t end up with uneven wood floors to paint. More importantly, remember to sand in the same direction as the grain.


Before you proceed with sanding, quickly but thoroughly inspect all the wood floorboards that you want to paint. This is the best time to do repairs or replacements of the floorboards if you want to make the project go as smoothly as possible.


Once you’re done sanding and there is nothing on the surface except bare wood, sweep or vacuum thoroughly to remove dust and wood residue. Finish off cleaning up by wiping the wood floors with a wet mop and a tack cloth.

How to paint floors | Home on the Range

http://www.paintmewhite.com/

Primp and prime


After cleaning up, apply primer to the wood floors before applying paint. Primers are important to the success of your painted wood floors so be sure to look for the appropriate priming product. Begin application at the edge of the room using a brush. Once you have covered all the edges, work inside from one end to the other. Let the primer dry according to manufacturer’s instructions.


Applying the first coat


Apply the first coat in the same manner you did the primer – brush it from the edges then work inward. In general, it is advised that you use oil-based paint for wood floors as they can appear more polished and, if you make mistakes, it’s easier to sand them off.

How to paint floors | Home on the Range

http://styleguide.homedepot.com/

Another neat trick in successfully painting wood floors is to use a natural brush in applying paint instead of rollers to create a smoother finish.


After the first coat has been applied, allow it to dry completely then lightly sand using 220-grit sandpaper. You can also use sand screens with a drywall pole sander then clean up with a damp dust mop and tack cloth.


Apply a second and third layer of paint. Keep in mind that each layer should be as thin and even as possible. The thicker the coats are, the easier they wear out.


Dried and cured

How to paint floors | Home on the Range

 http://roomsinteriordesign.blogspot.com/


Be sure to let the painted floors dry completely to ensure success. Let it dry before you start walking on it and once its dried, to be safe, allow 24 hours before bringing in the furniture. Be mindful of those stilettos too.


While drying can take 24 hours or less, complete curing of the paint can take up to four weeks. So be sure to consider that before dragging in the piano or anything.


Follow these steps and don’t be afraid to explore colors and patterns to create a fresh look for your wood floors.


About the Author:

Bryan Vu is a home improvement blogger and community outreach associate for BuildDirect, a leading flooring and building materials provider online.

Larger than Light | Home on the Range

Image via Home on the Range

How exciting!  We have been featured in another publication this month!  This time, Lynne was asked to choose a favorite light fixture and describe what she loved about it and how she had used it in design.  The interview is featured in the “Bright Ideas” section of the magazine, along with a picture of Lynne, and a photo of the room she used it in.  Thanks so much for the opportunity Larger Than Light, we love publicity, and sharing our favorite things with other people!  To see the article, click on this link.  You will find the Bright Ideas piece on page 5, but the rest of the magazine is also worth a read!

We are so excited to have started our Ask the Designer series this week!  Thanks so much to everyone who submitted questions to us, sorry we couldn’t answer all of them!  If your question wasn’t answered this week, please feel free to resubmit it in our next round of questions, or any other questions that might come up in the mean time.  This week, we decided to answer the first three questions that we received, and the answers are straight from Lynne Bier, our Principal/Lead Designer, and the owner of Home on the Range (basically, as expert as expert gets).  So, without further ado, here’s the Q&A!


Question 1:

Tracy asks: Our house is so in need of a total redo. No idea where to start so we do nothing. Considering starting small – one bathroom. The bathroom has a blue formica countertop and beige 6X6 ceramic tile. This has to be a low budget re-do, so don’t want to touch the counter and the floor. Paralyzed by having to choose a modern color. Suggestions?

Answer: Tracy, you’re lucky that blue is back in style as a design color of choice!  Here in the mountains, we do need to be aware of how our blue comes across though… if you don’t warm it up with some other colors, you can wind up with an “igloo” impact.  There are a few different things that you can do to add color without spending tons of money.  Our favorite color palette right now is Pantone’s “Rugged Individuals” palette.  Any of these colors would be great additions to the blue that you already have going on, and would help to warm it up.  Choosing a neutral color for the walls is a great place to start… painting may be time consuming but it’s a cheap fix!  Next, consider combining some of the other colors in the shower curtain, rug and towels.

The Rugged Individuals Palette

The Rugged Individuals Palette

Don’t go with all the same color.  For a subtle look, try different shades of the same color.  For a bolder look, choose two or three colors and mix and match them in your accessories.

Another way to change the entire look and feel of a bathroom without a massive overhaul is with your mirror.  Adding interest to the mirror will make such a difference in updating your bathroom.  Depending on your budget, you can either choose a new decorative mirror (our personal favorite option) or you can add a frame to your existing mirror to give it a new look.

Image via Sabby in Suburbia

Image via Sabby in Suburbia

Image via Home on the Range

Image via Home on the Range


My final advice in updating your bathroom is this: light fixtures.  While it may be something that you don’t consciously notice when you walk into a bathroom, light fixtures are often the element that dates a room more than anything else.  Without seeing pictures of your bathroom, I can’t give you any specific advice on your current fixtures, but just know that it is a big thing to be aware of!  Good luck on your bathroom redo adventures!


Question 2:

Edith asks: How to update for a bigger TV without throwing out the magnificent mahogany hardwood TV cabinet ?

Answer: If the tv doesn’t fit in the cabinet any longer, it’s going to have to go!  The good thing is, it doesn’t have to go to the dumpster.  If you love the mahogany cabinet and just can’t bear to replace it, consider using it somewhere else in your home.  Maybe it could find a new life as a linen cabinet?  Maybe as an additional storage cabinet in a guest room?  If you can find a way to save this piece and give it a useful job somewhere else, you will feel much better about updating your tv area.  Now back to what to do with the new tv. Many people are dealing with this same issue right now- tvs just keep getting bigger and flatter, and it’s getting more and more difficult to find ways to contain them.  One new method that I personally love for hiding your flat screen tv in plain site is this- frame it.

Image via Pinterest

Image via Pinterest


Hanging a tv on the wall and putting a frame around it won’t hide it completely from view like your old cabinet may have, but it will make it look like something that is supposed to be there.  You will still want to place a new furniture piece underneath it to hold the cable box and dvd player (as well as make the space look complete), but if you don’t want to spend too much money, consider swapping the old tv cabinet with another furniture piece in your home.  They can switch places, and without spending much money, you can create a whole new look in your home.


Question 3:

Mary asks: With all the unfinished and rough surfaced woods (walls, cabinets, counters, furniture, decorative items) what do you suggest for dusting/cleaning?

Answer: Vacuums are your best friend!  Use a soft brush attachment to get down deep into all those little spaces… it will just suck the dust right out of them!  You can experiment with different attachments, but the soft brush is definitely my favorite.  Using anything else (paper towels, swiffer dusters, rags, microfiber, etc) will always leave behind little fibers that are hard to get rid of later.  My favorite vacuum to use is the handheld Dyson (they didn’t even pay me to say that!) because it’s so portable, and you can use it to get to anything, high or low.  But, really, any vacuum with attachments will work.

Well, that’s it for now!   Thanks again for all of the submissions, and if we didn’t get to your question this week please send it to us again next time.  We’re going to make this a monthly thing, and we’ll be accepting questions again on Facebook starting three weeks from now, so make sure and keep your eyes open for it!

Last week, we took you on a photographic tour of the Frank Lloyd Wright style house designed by Architect Joe Patrick Robbins, AIA,  that Lynne Bier is currently working on in Houston, Texas.  Though commuting from Steamboat to Houston and “long distance design” come with their own set of obstacles, it is very exciting to be a part of such a fun and unique project.  The “Prairie Style” that Frank Lloyd Wright pioneered has a very distinct look that is not often seen in the mountains, so working on this house is a new design experience and also a welcomed change of pace for Lynne and Home on the Range.  So, without further ado, here are some of the elements that will be featured in the house:


While Prairie Style tends to use more rectangular and linear shapes,  and the first pendant fits the typical interpretation of the style, the round  geometric shape of the second pendant still works well with the Prairie style. It will be hanging in the two story stairway with the tall corner windows and will help to soften the tall rectangular shape of the tower.  The bath vanity light fixture by Hubbardton Forge has a very Prairie Style back plate that is softened with the oval glass.

Frank Lloyd Wright Lighting | Home on the Range

Kitchen pendant lamp

Frank Lloyd Wright house lighting | Home on the Range

Circular pendant lamp

Frank Lloyd Wright house lighting 2

Master bedroom light fixture


Another way that we are focusing on the linear in this house is through hardware choices.  These elegant pieces are clean and simple, yet unique and interesting at the same time. The top pull from Emtek exhibits the linear form, while the bottom pull from Schaub is a softer, more contemporary interpretation and both are perfect additions to a Prairie Style home.

Frank Lloyd Wright house lighting 2

Frank Lloyd Wright Style hardware 2 | Home on the Range

When using an abundance of prominent lines and strong geometric shapes in a space, it’s definitely important to focus on color, which helps to avoid an institutional feeling of starkness.  Here are some of our color choices, I love the subtle greens, creams, and especially the coppery shade in the light fixture, which will help play off of the cherry cabinets in the kitchen cabinets and the custom dining room hutch.

Frank Lloyd Wright House color palette | Home on the Range

Frank Lloyd Wright style light fixture | Home on the Range

Dining Chandelier by Hubbardton Forge


The master bath tub pulls the soft gray green into the bathroom and we will use the same color on the entry built-in cabinet and on the walls in the master bedroom.

Prairie style soaker tub | Home on the Range

Master bath free standing tub with custom color, by Cheviot.


We’re bringing the outside in by putting the stone from the exterior on the wall of the powder room – it will be a great textural backdrop to the Noche Travertine countertop and custom bronze sink.

Frank Lloyd Wright style stone | Home on the Range

Exterior Stone with linear lay


Are you getting more excited to see the final result?  I know we are!  Stay on the look out for more updates about the Houston Prairie Style house as we progress.  We are thrilled to be able to share this project with you!

Images via mary schanner photography

Your home isn’t just a reflection of your taste; it’s a reflection of your life. Photo walls are a great way to showcase your memories, while also displaying what makes you unique.  There is no limit to what you can do with a photo wall.  You can make it simple, elegant, modern, rustic, traditional, eclectic, or any mix of the above.  It all depends on your creativity!

Image via Laura Winslow Photography

Picture walls are a great decorating idea for hallways, stairwells, and even small walls. While picture displays do take some strategic planning as far as placement and frame choice, once done, a photo wall can be the perfect addition to your space.

Image via Mix and Chic

The frames you choose will naturally control which pictures catch the eye first. Don’t be afraid to use different textures, but the frame colors should all compliment the room. Different frame sizes effortlessly add depth to the display and draw attention to certain photos.

Image via attic.

Image via Ciao! Newport Beach

Take a moment to strategize. Tape off space on the floor the same size as your wall, and try out different arrangements.

Image via Crush Cul de Sac

Don’t be afraid to be different. Throw in some sentimental pieces in your frames, such as the letter your mother wrote you on your wedding day or ancient black and white family photos.

Image via Casa in Stile

Try the eclectic (but rapidly growing in popularity) corner arrangement.

Image via Apartment Therapy

Try a different way of hanging photos: use string, rope, clothespins, drawer pulls, whatever you can think of!

Image via Urban Comfort

Image via Shelterness

Make a shelf display.

Image via Two Twenty One

Finally, after you’ve laid out frames and you know the arrangement that works best for you and your space, start from the middle of the wall and work out.  This will make your life much, much easier!

The Home on the Range showroom has TONS of beautiful and unique frames that will help you get your photo wall started, so stop by today!

For other great ways to make your home cozy and inviting, check out our Pinterest page.

A cozy and inviting office is an ideal place to set-up and work this winter. If you create a space that you love being in, then you won’t mind working over-time!

Image via Home on the Range

For your perfect home office, choose a spot in your house that offers you plenty of functional storage space and keeps distractions to a minimum. The location of your office should really be dependent on how you work. If you know that you will easily be distracted by street activity or tempted by a sunny day, consider an office tucked away towards the back of your home.

Or, if you want a bright and energetic space, placing your desk in front of a window might be just the ticket.

Image via Home on the Range

Every great office needs substantial storage. Loose papers and beaten up boxes aren’t just visually unappealing, they also make it hard to function.  Cabinets, shelves and drawers will be your office’s best friend.

Image via 42Concepts.com

Offices don’t always have to be traditional work spaces either. Your home office can be a reflection of yourself in every way, and you can add flair to your office just like you do in the rest of your home.  Here are a few examples of some of our favorite unique offices:

Image via Splendid Sass

Image via My French Country Home

The last thing to remember when creating your home office is to keep it comfortable. You want to create an environment you enjoy being in. Invest in a comfortable chair and create a welcoming atmosphere, and remember that this is your home office, not a cubicle.

To find your perfect traditional or eclectic office pieces, stop into Home on the Range today!

Olioboard

Mom's retreat by Selma Hammer - Image via Olioboard

You may have seen mood boards or renderings used by interior designers to convey a concept and material selection. Now homeowners can easily join in the fun with Olioboard. According to the trade newspaper Furniture Today:

Olioboard is an interior design-focused social media website that allows users to create online room settings using a library of more than 100,000 products.”  Even if you aren’t a designer, you can have fun creating boards on Olioboard.

Lets take a look at some of the engaging renderings you can create with Olioboard.

Keeping it "formal" - Image via Olioboard

Keeping it "formal" - Image via Olioboard


Romantic Balcony in Paris

Romantic Balcony in Paris - fun and whimsical! Image via Olioboard

We have been using Olioboard to show ideas to our clients because it is a great visualization tool.  We can upload pictures of the rooms we are working with along with the products we are recommending for a truly custom Olioboard presentation!  Here are a couple  of Olioboards we created for fun.

Here comes the sun

Lynne Barton Bier - Home on the Range Interiors Image via Olioboard

Cool, Calm and Collected

Lynne Barton Bier - Home on the Range Interiors Image via Olioboard

Take a look at some of out other creations on   Olioboard, or contact us if you have an idea for a room you would like help with!

Home on the Range designer Lynne Bier enjoyed the Design Bloggers Conference last week and wants to spotlight renowned interior designer Bunny Williams, who gave the keynote speech on the final day of the conference.

Lynne Bier and Bunny Williams

If you’ve been following the conference buzz on Twitter, you may have seen how much everyone loved Bunny Williams’ talk  – so much that Bunny received a standing ovation!   She has a wise outlook on the industry, and her interior design style is a marriage of beauty and function. Blending modern and traditional pieces in her design, Bunny strives for—and achieves—timeless spaces that are comfortable and lived in, characteristics that are easily seen in the design of her own apartment:

Here are a few of the points from Bunny’s talk that Lynne Bier says really spoke to her:

Select several quality pieces of furniture and you will have them forever

Stay neutral on your main upholstered pieces and then you can use pillows and throws to change things up when you want to add a new touch

Study everything you can, travel for new ideas and stay organized.  Design takes a lot of work and focus

Give back to the community and mentor young designers

Mix in pieces from different eras and different countries to keep your design interesting

Visit BunnyWilliams.com to learn more about the interior designer as well as her BeeLine Home collection.


Images via bunnywilliams.com

A great place to start your room can be with an oriental carpet, a favorite piece of art or a fabric that you love. At Home on the Range Interiors, we have even used stone walls as our starting point! Once you have the key element selected, it will become the inspiration for the other colors, fabrics and finishes in the room.

In this Western Mine Style Home, designer Lynne Bier started with the purple moss rock the clients had selected and that was used throughout the house. The fabrics and finishes she selected to complement the rock were blends of the colors in the rock. The soft moss green, purple hues and red flecks of garnet made a beautiful color palette for this home.

In this Pioneer Homestead Home, we began with the colorful rugs and weavings the owner had collected from areas as diverse as Morocco, South Africa and the American Southwest. This bright, bold palette cried out for fabrics and wall colors that were neutral and that would create a backdrop for the colorful textiles. The color was then pulled back out in key furniture pieces.

The vibrant turquoise paint on the sofa table repeats the turquoise color in the Moroccan rug.

Our client in this home is an artist, and we used the piece of art she selected to hang in the entry as the color inspiration for this space.

The possibilities are limited only by your imagination. Pick something you love and then create your room around itgive it a try, and let us know how you do!

–Lynne Barton Bier, Owner/Principal Designer, Home on the Range

Images: Interior designs by Home on the Range; Photos by Tim Murphy; Architecture by Joe Patrick Robbins, AIA